Replacing a window regulator in your car can be a daunting task, but with the right tools and a DIY enthusiast’s spirit, it’s a job you can tackle successfully. Window regulator replacement involves removing the door panel, disconnecting the old regulator, and installing a new one. To make this process smoother and more efficient, having the right tools is crucial. In this article, we’ll explore the top window regulator replacement tools for DIY enthusiasts, making the job easier and more enjoyable.
1. Screwdriver Set:
A set of screwdrivers is a fundamental tool for any DIY enthusiast. You’ll need both flathead and Phillips-head screwdrivers to remove screws securing the door panel and other components. Ensure you have various sizes to accommodate different screw types and sizes.
2. Trim Removal Tools:
These plastic or nylon tools are designed to help you safely remove trim pieces, clips, and fasteners without damaging the interior of your car. They come in various shapes and sizes to suit different applications. Trim removal tools are particularly handy when removing the door panel without causing scratches or dents.
3. Socket and Ratchet Set:
A socket and ratchet set is essential for removing bolts and nuts, including those securing the window regulator and motor. Ensure you have a range of socket sizes to fit various fasteners on your car. A ratchet handle allows for easier maneuvering in tight spaces.
4. Pliers:
Pliers, especially needle-nose pliers, can be handy for tasks like removing clips, holding small parts in place, or reaching into tight spaces. They provide extra grip and control when working on window regulator components.
5. Torx Bit Set:
Many modern vehicles use Torx screws, which have a star-shaped recess in the head. To access and replace the window regulator, you may need Torx bits in various sizes. Having a Torx bit set ensures you’re prepared for any type of fastener you encounter.
6. Panel Clip Removal Tool:
Door panels are often secured with plastic panel clips. A panel clip removal tool helps you disengage these clips without causing damage. This tool is essential for door panel removal and reinstallation.
7. Multimeter:
A multimeter is a versatile tool that can help diagnose electrical issues with your window regulator and motor. You can use it to check for power supply, continuity, and voltage, ensuring your electrical components are functioning correctly.
8. Wire Crimping and Stripping Tool:
If you need to splice or repair wiring during the replacement process, a wire crimping and stripping tool is invaluable. It allows you to strip insulation from wires and create secure electrical connections.
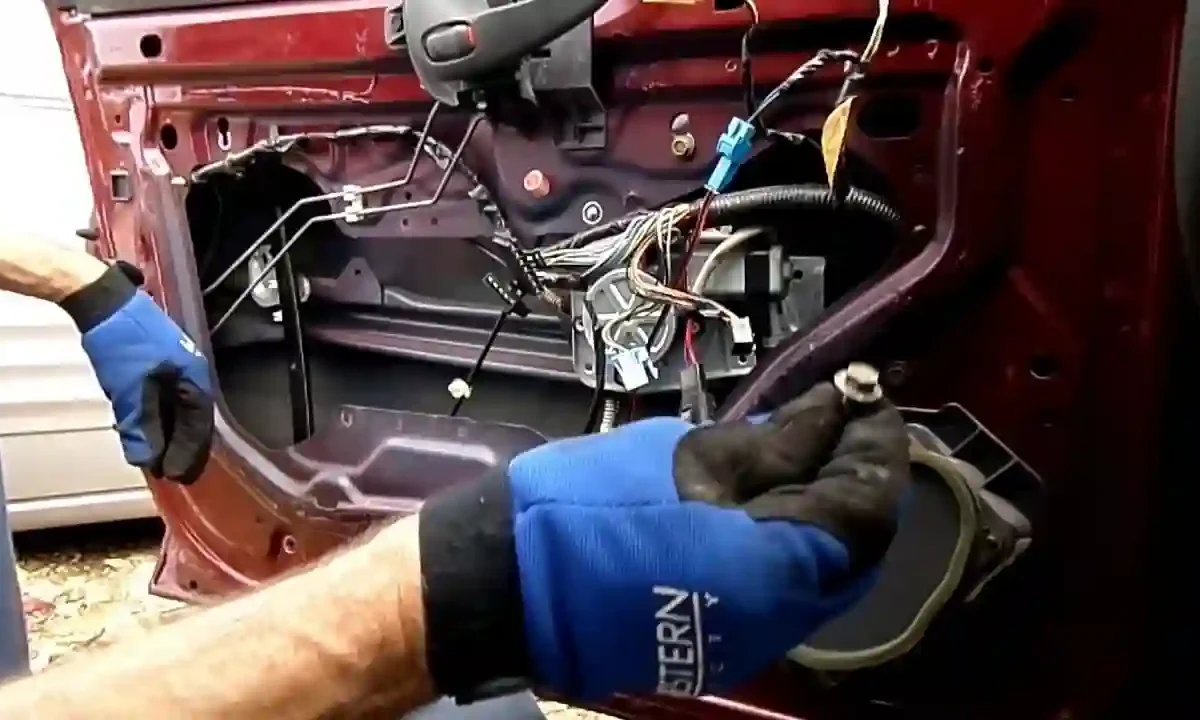
9. Work Gloves:
Safety should always be a priority. Wearing work gloves helps protect your hands from sharp edges, hot components, and any potential debris during the window regulator replacement process. Choose gloves that provide both dexterity and protection.
10. Safety Glasses:
Safety glasses are essential to protect your eyes from dust, debris, and any potential hazards while working on your car. Always wear safety glasses to prevent injury.
11. Magnetic Pickup Tool:
A magnetic pickup tool is a handy addition to your toolkit. It helps retrieve dropped screws, bolts, or other small metal parts from tight spaces, preventing frustration and saving time.
12. Jack and Jack Stands:
In some cases, you may need to raise the car to access the window regulator from below. A hydraulic jack and a set of jack stands provide a safe and stable platform to lift the vehicle securely.
13. Work Light or Headlamp:
Good lighting is essential when working inside the door panel or under the dashboard. A portable work light or a headlamp allows you to see clearly and perform tasks with precision.
14. Replacement Window Regulator:
Of course, the most critical tool for the job is the replacement window regulator itself. Ensure you have the correct replacement part that matches your vehicle’s make and model.
15. Service Manual or Repair Guide:
While not a physical tool, having access to a service manual or repair guide specific to your car can be invaluable. It provides step-by-step instructions, diagrams, and troubleshooting tips tailored to your vehicle’s window regulator replacement.
Tips for a Successful DIY Window Regulator Replacement:
Now that you have your toolkit ready, here are some additional tips to ensure a successful window regulator replacement:
- Plan Ahead: Before starting the replacement, read through the service manual or repair guide to familiarize yourself with the process. Plan your steps and gather all necessary tools and replacement parts.
- Disconnect the Battery: For vehicles with power windows, it’s essential to disconnect the battery before working on the electrical components to prevent accidental short circuits or electric shocks.
- Take Photos: As you disassemble the door panel and components, take photos or make notes to help you remember the proper reassembly order and locations of screws and clips.
- Work Methodically: Follow a systematic approach when disassembling and reassembling components. Keeping organized and methodical will make the process smoother.
- Test Before Final Assembly: After installing the new window regulator, test the window’s operation before reassembling the door panel. This ensures that everything is functioning correctly.
- Be Patient: Window regulator replacement can be a challenging DIY task, especially for beginners. Take your time, and don’t rush the process. Patience and attention to detail are key.
- Double-Check: Before finalizing the assembly, double-check all connections, fasteners, and electrical components to ensure everything is secure and in working order.
- Safety First: Always prioritize safety during the replacement process. Use appropriate safety gear, work in a well-ventilated area, and follow safety guidelines.
By equipping yourself with the right tools and following these tips, you can tackle a window regulator replacement as a DIY enthusiast with confidence. Remember that if you encounter challenges or feel unsure about any step of the process, seeking guidance from a professional mechanic or a repair manual is always a viable option. Happy DIYing!